
15 Amp vs 20 Amp Circuit Differences
If you have ever opened the door to your electrical panel or looked closely at the outlets in your kitchen versus your bedroom, you may have noticed that not all circuits are created equal. To the untrained eye, electricity is just electricity. You plug a cord in, and the device works. However, behind the drywall and inside that metal breaker box, there is a strict hierarchy of power distribution designed to keep your home safe and functional. The two most common types of circuits found in residential homes in Greenville are rated for 15 amps and 20 amps. While the difference of just five amps might sound negligible, it represents a significant leap in power capacity and requires completely different infrastructure to support it.
Understanding the distinction between these two circuits is not just academic trivia. It is essential knowledge for any homeowner who plans to do a renovation, buy new appliances, or simply wants to understand why the breaker trips every time the hair dryer and the space heater run simultaneously. The electrical system is balanced on a razor’s edge of capacity versus demand. When you overload a circuit, you are asking the wires to carry more energy than they can handle, creating heat and potential fire hazards. Knowing where your 15 amp circuits end and your 20 amp circuits begin helps you manage your electrical usage safely and effectively.
The Visual Difference in Receptacles
The most immediate way to tell the difference between these two circuits is often right on the wall. Standard household outlets, technically known as receptacles, come in different configurations to match the circuit rating. A standard 15 amp outlet, which you likely have in your living room and bedrooms, has two vertical slots and a round grounding hole. This is known as a NEMA 5-15R. It is the ubiquitous outlet that fits almost every lamp, phone charger, and television cord.
A 20 amp outlet looks slightly different. It also has the two vertical slots and the ground, but one of the vertical slots—specifically the neutral slot, which is the wider one—has a horizontal notch attached to it, creating a T shape. This is a NEMA 5-20R. This design is intentional. It allows you to plug in a standard 15 amp plug, but it also accepts a specific 20 amp plug that has one horizontal prong. These heavy duty plugs are found on large appliances like commercial grade treadmills, large window air conditioners, or heavy power tools. The design prevents you from accidentally plugging a high power 20 amp device into a weaker 15 amp circuit, where it would immediately trip the breaker or overheat the wiring.
However, visual identification has a caveat. It is entirely legal and common to have 15 amp outlets installed on a 20 amp circuit, provided there is more than one outlet on that circuit. This is why you will often see standard looking outlets in your kitchen, even though the breaker in the panel is labeled 20 amps. The internal wiring is capable of 20 amps, but the interface is standard. Conversely, you should never see a 20 amp T slot outlet on a 15 amp circuit. That is a code violation because it invites an overload. To be absolutely sure of what you have, you must check the breaker panel or the wire gauge itself.
The Hidden Difference in Wire Gauge
The physical outlet is just the tip of the iceberg. The real difference lies deep inside the walls in the copper wiring that carries the current. Electrical wire is sized according to the American Wire Gauge (AWG) system. In this system, a smaller number indicates a thicker wire. This can be counterintuitive, but it is the standard. A 15 amp circuit is wired with 14 gauge wire. This wire is typically sheathed in white plastic casing (Romex) in modern homes. It is relatively thin and easy to bend, making it a favorite for electricians wiring lighting circuits.
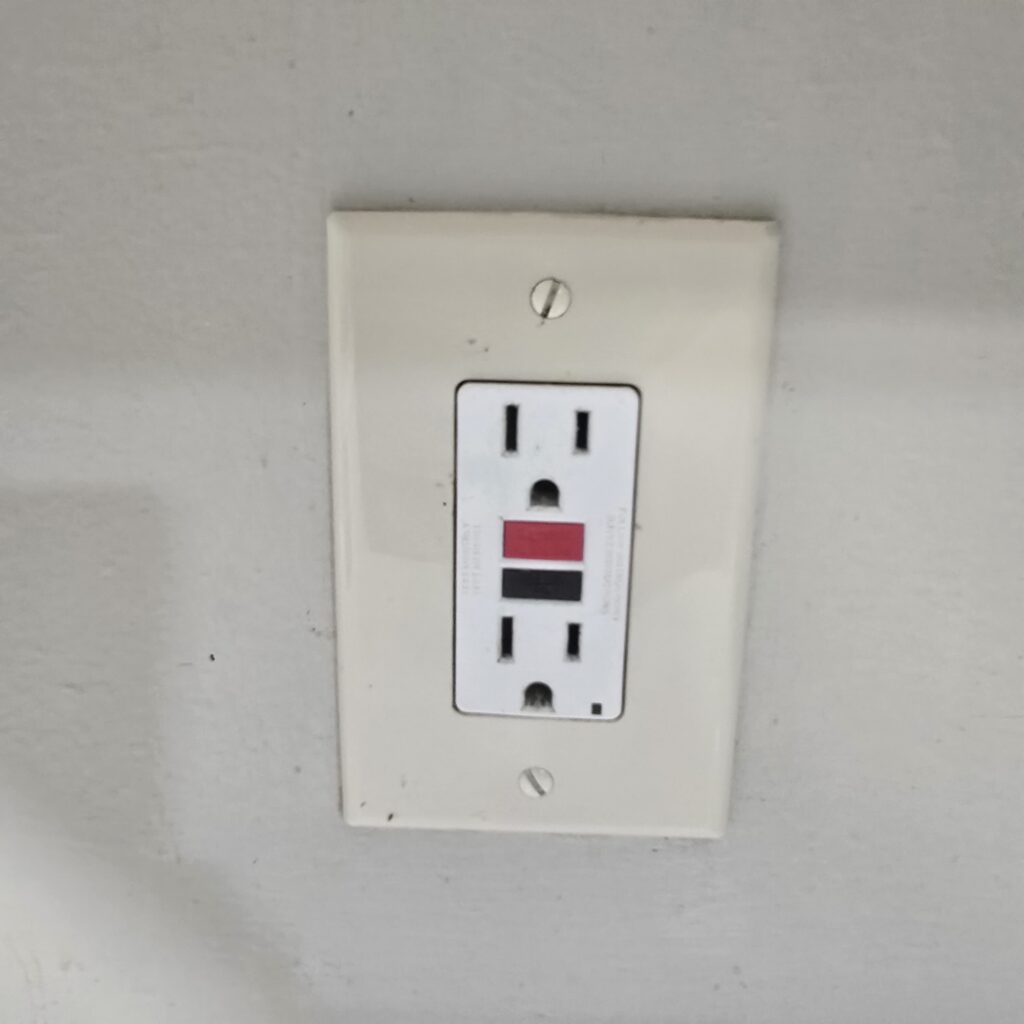
Need a GFCI outlet install? Click here for our GFCI outlet installation service.
A 20 amp circuit requires thicker, more robust wire. It must use 12 gauge wire. In modern color coding, this wire is usually sheathed in yellow plastic to make it easy to identify at a glance in a dark attic or crawlspace. The 12 gauge wire is significantly thicker than the 14 gauge. This extra thickness reduces the electrical resistance of the wire. Lower resistance means the wire can carry more current without getting hot.
If you attempt to push 20 amps of current through a thin 14 gauge wire, the resistance will cause the wire to heat up rapidly. It acts like a heating element in a toaster. The insulation will melt, and the surrounding wood framing can ignite. This is why the National Electrical Code is so strict about wire sizing. You can always use thicker wire on a smaller circuit (using 12 gauge on a 15 amp breaker), but you can never use thinner wire on a larger circuit. This physical limitation is the primary reason why upgrading a circuit is not as simple as just flipping a switch.
Calculating Power Capacity
To understand what you can plug into these circuits, you have to do a little math. Power is measured in watts. To find the wattage capacity of a circuit, you multiply the volts by the amps. In a standard US home, the voltage is 120 volts. For a 15 amp circuit, the calculation is 120 volts times 15 amps, which equals 1800 watts. This is the absolute maximum the circuit can handle before the breaker trips.
However, for safety, electrical codes dictate that for continuous loads (running for three hours or more), you should only use 80% of the circuit’s capacity. This provides a safety buffer. So, the safe continuous load for a 15 amp circuit is actually 1440 watts. A single high end hair dryer can draw 1500 watts. This explains why running a hair dryer and a TV on the same 15 amp bedroom circuit usually works, but turning on a space heater at the same time trips the breaker instantly.

A 20 amp circuit offers a significant power advantage. The math is 120 volts times 20 amps, giving you a total capacity of 2400 watts. The safe continuous load is 1920 watts. That extra 600 watts of total capacity (or 480 continuous) is a game changer. It is the difference between being able to run the toaster and the coffee maker at the same time versus having to alternate them. It provides the headroom needed for modern, high wattage motors and heating elements to operate efficiently without starving for power.
Kitchen and Laundry Requirements
The layout of these circuits in your home is not random. The National Electrical Code (NEC) mandates specific locations where 20 amp circuits are required because of the known power demands of those rooms. The kitchen is the biggest consumer of electricity in the house. The code requires a minimum of two 20 amp “small appliance branch circuits” to serve the countertops. This ensures that you can use your blender, mixer, and toaster oven without nuisance tripping.
Your microwave, if it is a built in model, typically requires its own dedicated 20 amp circuit. Microwaves are notorious power hogs. Even though the box says “1000 watts cooking power,” the actual electrical draw from the wall is often much higher, sometimes close to 1500 watts or more when you factor in the efficiency loss. Putting this on a 15 amp circuit that shares lights or other outlets is a recipe for a dark kitchen.
The laundry room is another area where 20 amps is the law. A washing machine has a powerful motor that draws a large surge of current when it starts its spin cycle. To prevent lights from dimming or breakers from tripping during the wash, a dedicated 20 amp circuit is required for the laundry receptacle. While gas dryers can plug into this 120 volt outlet, electric dryers require a completely different 240 volt, 30 amp circuit, which is a different beast entirely.
Lighting and General Living Areas
So if 20 amp circuits are better and stronger, why do we still use 15 amp circuits? The answer lies in the general living areas like bedrooms, living rooms, and dining rooms. In these spaces, the electrical load is typically very light. You are plugging in LED lamps, phone chargers, televisions, and perhaps a laptop. The total draw of these devices rarely comes close to the 1800 watt limit of a 15 amp circuit.

Furthermore, lighting circuits are almost exclusively 15 amps. Modern LED lighting draws a tiny fraction of the power that old incandescent bulbs did. You could wire an entire massive house full of LEDs on a single 15 amp circuit and still have room to spare. Because 14 gauge wire is thinner, it is easier for electricians to work with. It is easier to fold into small switch boxes, easier to twist together, and cheaper to buy.
Using 12 gauge wire for lighting is unnecessary overkill. It makes installing intricate banks of dimmer switches physically difficult because the stiff, thick wires take up too much space in the box. Therefore, most homes in Greenville are wired with a hybrid approach: 20 amp circuits for the heavy work zones (kitchen, garage, baths) and 15 amp circuits for the lighting and general relaxation zones.
The Danger of Mismatched Breakers
One of the most dangerous situations we encounter at Whiting Electrical Services is when a homeowner or an unlicensed handyman attempts to “upgrade” a circuit incorrectly. The scenario is common: the homeowner keeps tripping the breaker in the bedroom because of a window AC unit. They go to the hardware store, buy a 20 amp breaker, and swap out the old 15 amp breaker. They assume that because the breaker fits in the panel, it is safe.
This is a critical, life threatening error. The breaker is the safety valve for the wire. It is sized to protect the wire from melting. If you put a 20 amp breaker on a circuit wired with 14 gauge wire, you have removed the protection. The 14 gauge wire is only rated for 15 amps. If you draw 18 amps, the wire will begin to overheat, but the 20 amp breaker will not trip because it thinks everything is fine. The wire can get hot enough to ignite the paper backing on insulation or the wood stud it is stapled to.
This creates a hidden fire hazard that may not manifest for months or years. It might only catch fire on a particularly cold night when a space heater is left running for hours. We verify the wire gauge on every service call because this specific code violation is unfortunately very common in older homes that have been patched up over the years. You must always match the breaker to the wire, never the other way around.
Garage and Workshop Needs
The garage is a space that straddles the line between general storage and heavy industry. In a standard builder grade home, the garage might only have one GFI outlet on a shared 15 amp circuit that also powers the outdoor porch lights and maybe a bathroom outlet. This is woefully inadequate for anyone who uses the garage for projects.
Want to know the benefits of installing a home EV charger? Click here for more information.
Power tools are demanding. A table saw, a miter saw, or a large air compressor has a massive “inrush current” requirement. When you pull the trigger on a saw, the motor draws two to three times its running wattage for a split second to get the blade moving. On a 15 amp circuit, this surge often trips the breaker immediately. Even if it runs, the voltage drop caused by the thin wire can starve the motor, causing it to bog down and burn out prematurely.
For any serious garage workshop, 20 amp circuits are mandatory. We often recommend running dedicated 20 amp lines for the workbench. This ensures that your tools get the full power they need to cut cleanly and safely. If you have a freezer or a second refrigerator in the garage, it absolutely needs a dedicated circuit, preferably 20 amps, to prevent the compressor from overheating during the hot Greenville summers.
Upgrading From 15 to 20 Amps
Homeowners often ask us if they can upgrade a 15 amp circuit to a 20 amp circuit. The answer is yes, but it is not a simple repair; it is a rewiring project. Because the limitation is the physical wire inside the wall, upgrading the capacity means replacing that wire. We cannot simply change the outlet and the breaker.
To upgrade a circuit, we have to physically remove the old 14 gauge wire and pull new 12 gauge wire from the main panel to the first outlet, and then to every subsequent outlet on that circuit. In a house with finished drywall, this can be invasive. It may involve cutting access holes in the walls or fishing wires through difficult attic spaces.
However, in many cases, it is worth the effort. If you are renovating a bathroom or adding a home office with high end computer equipment, the stability and capacity of a 20 amp circuit are invaluable. It adds value to the home and ensures that your electrical infrastructure is future proofed against the increasing power demands of modern technology.
The difference between 15 amps and 20 amps may seem small on paper, but in practice, it defines the capability and safety of your home’s electrical system. 15 amp circuits are the nimble, general purpose pathways for our lights and small devices. 20 amp circuits are the heavy lifters, designed to handle the heat and the load of the machines that run our lives.
Recognizing the difference protects you from dangerous DIY mistakes and helps you plan better for renovations. Whether you are dealing with a tripping breaker, planning a new kitchen, or setting up a workshop, respecting the limits of your wiring is paramount. Electricity is a powerful tool, but it demands the right infrastructure to be used safely. If you are unsure about what circuits you have or if you need to upgrade to handle a new appliance, do not guess. Contact Whiting Electrical Services in Greenville, NC. We can evaluate your system, identify the wire gauges, and ensure that your breakers are sized correctly to keep your home safe and powered up.